


There are many ways and methods of beginning a foundation for your shed, but so as to keep this manual simple we will begin by looking at the procedures followed while building a shed. The types of the foundation include a concrete slab foundation, a sunken pillar, and wood skid. The e-book is helpful to those who might not be interested in shed building from the scratch. It takes time to explain in detail the materials required and the step by step methods required to give one the moral to build the shed. It also explains the easy steps in a very fun way. Furthermore, the process of building your shed on your own is quite a fun task as one watches the shed start from nothing to something beautiful and useful. Isn’t that exciting? At least one feels useful after performing such type of a task that feels to be quite a huge burden. The following steps are derived from the e-book on steps used to build a foundation:
1. Dig the building site and add a four-inch layer well-matched gravel. If desired you may add an allowance to the base for the optional wood ramp. The gravel is packed thoroughly to ensure that it is leveled.
2. Cut three 4 by 4 treated timber skids at 144 inches. Arrange and level the skids on the gravel bed.
3. Cut 2 by 6 rim joists at 144 inches and ten joists at 93 inches. The joists are then marked to on to the rim joists. The edging is then assembled with the 16d galv. Common nails; be sure to crisscross each joist for capping and fix it with the crowned edge up.
4. Set the floor frame on top of the skids and measure the diagonals to make sure it is square. The metal clip is then installed at each of the joists alongside the two exterior slips, using 11/2 inch joist hanger nails and 16d galv. Common nails, toenail each joist to center skid with 16d galv. Nails.
5. Install the tongue-and-groove for sheathing, starting with a full sheet at the corner of the frame. Use 8d galv. Nails drove every 6 inches along the edges and every 12 inches in the field.
Secure the joists to outer skids with angles. Drive hanger nails into the joists and 16 d nails into the skids. Frame and raise the walls, then fasten adjacent walls together at the corner studs.
Tools required — the Second step
For one to be successful in a given task, one of the major requirements is the tools which are used to perform the task. The following are the tools required:
• Pair of work gloves — to protect you from small objects that may hurt your hands.
• An electric drill with various attachments — the attachments are modified to suit the size of the hole being drilled.
• Claw hammer — used to drive the nail in wood and also remove the unnecessary nail from wood.
• Carpenter’s pencil — to be used to mark important measurements on the wood.
• Jab saw — Used to cut small unnecessary objects in building materials
• An array of fasteners — they include nails and screws.
• Clamps preferably C- clamps. They are used to fasten objects tightly to prevent movement or separation.
• Measuring tape — to take important measurements.
• A level.
Shed building Plans — Third step, Lumbering
Whether treated or untreated, wood that is being exposed to the outside elements is very prone to decay. The guide will highlight the fundamentals of exterior wood preservation.
I. Wood quality
Since the shade is an outdoor structure, it will face various weather elements like sunshine, rain, snow, wind and other factors as insects and moulds. If you are not sure on the wood selection, it would be better to seek advice from a wood expert who will guide you through the best wood you would use to build your shed depending on the climate your region experiences.
I would advise you to aim for the type of wood that is resistant to deforming, fading, pets and dampness. Once at a local lumberyard, request for the heartwood, which is the innermost part of the wood in a tree. Unlike sapwood which is the outer most wood found in a tree, it is resistant to harsh conditions. The following species of wood are suitable for shed building: Cedar, Cyprus, and Redwood. Before buying the wood, check thoroughly that it has been well processed. Be cautious of wet wood to avoid shrinkage after you have already bought it and also Greenwood which may cause you inconveniences. The most common type of outdoor wood is pressure treated and consists of pine and fir.
Avoiding Decay
As I have said earlier, wood is normally exposed to everyday elements which lead to its decay and destruction. Here are some of the tips, from the best shed building plan e-book, for ensuring your wood lasts longer:
• Stagnant waters — As much as the wood is coated to protect it from water, it would still be advisable to keep the wood away from stagnant waters. This is as the wood coating is not a permanent coat and so is the wood is exposed to water it will get damaged over time. The best way to avoid water paddles near the shed is building gutter systems on its roof which directs the water to a tank or a pool.
• Conservation — one of the best ways to conserve the wood while at home is by spray treatment or applying wood polish using a brush. The following are the easy steps you may follow for to apply brush or spray treatment:
1. Wear rubber gloves, face mask to protect your eyes and an overall cloth to protect the rest of your body.
2. Using a sandpaper, smoothen the inconsistent wood parts and the joints.
3. By the use of a rag, ensure the wood is clean, dry and dust free.
4. Smear the liquid treatment twice to form a two-level coat. This is most especially done so as to ensure the wood is thoroughly protested especially at the joints, holes, and cracks.
There are two types of wood treatment. They include:
Ø Water treatment: consists of oil or water-based liquids. They prevent fungi growth but do not prevent termites from eating up the wood.
Ø Preservative treatment: Consists of chemicals. They prevent the growth of fungi and keep away termites from destroying the wood.
Staining: There are two types of staining. These can either be natural where the stains are purposed to enhance the beauty of the wood or unnatural means which involve activities like painting the wood. In natural means, one has to keep maintaining it frequently as they last for approximately two years while unnatural means last as long as up to eight years without needing any maintenance.
The Fourth Step, Shed building plans
After the concrete is all ready, the sole plates are then joined together with the anchor plates which protrude out of the foundation. Use the carpenter’s pencil and measuring tape to mark about one and a half inches from the board end continually every sixteen inches till the further end. These marks guide where the studs will be placed. Mark where the anchor and the mudsill meet up with a different marker from the one used initially. The studs are then taken and galvanized nails are driven through the marked areas into the center of the board until they reach the stud bottom. The studs should be secured to the baseboard.
After that, they played at the top plate across the opposite end and it should be secured to the studs with nails and screws.
The Fifth step, Wall building
The walls are then set on the anchor bolts, you should create a few buttresses which keep them in an upright manner for a temporary period before they are fully erected. With the walls secure but not completely sturdy, check whether they are well aligned to the plan.
You may use the Pythagoras theorem rule to check for alignment since you already have your measurements. Check and recheck to be sure that everything is rightfully placed.
Once everything has been double checked, pick the washers and nuts for the anchor bolts and secure them.
Check the corners of the shed to see if there is any space that is left. You can fill the spaces with fillers due to security reasons.
So as to increase the stability of the structure, double the top plates using additional measured boards. That enables the structure to withstand the pressure from the roof once it has been installed.
The Six step, roof framing.
There are many types of roof design that you can use to add to your shed. But since you are a beginner, I would advise you to build a simple roof structure so as to avoid the frustrations that can come with building complex roof structures. Complex roof structures also require additional tools and greats skills hence, it is time consuming and a bit expensive compared to the simple roof structure.
Due to the simplicity of the roof structure, I will guide you through the building of simple rafters. Boards of the same length and size are kept at intervals of approximately 12–15 inches along the length of the top plates. It is advisable to place the rafters directly over the wall studs.
It is recommendable that the rafter is a size smaller compared to the ridge board. The slope of the roof can be as steep or gentle as you wish but note that a steeper slope is harder to work on but it will increase the volume of the shed.
For the roof frame to be more compatible with the rest of the structure, the common rafters are cut so that it meets the ridge board. The rafters should be perpendicularly cut so that they fit into each other smoothly.
The Seventh step, completing the roof.
The first two rafters are taken and secured with nail or screw to the first end of the ridge board. The process is repeated with the opposite end of the ridge board. As long as everything is running smoothly, the remaining rafters are mounted in their encoded positions.
Once all the rafters are mounted, climb down the ladder to get a view of the progress you have made so far.
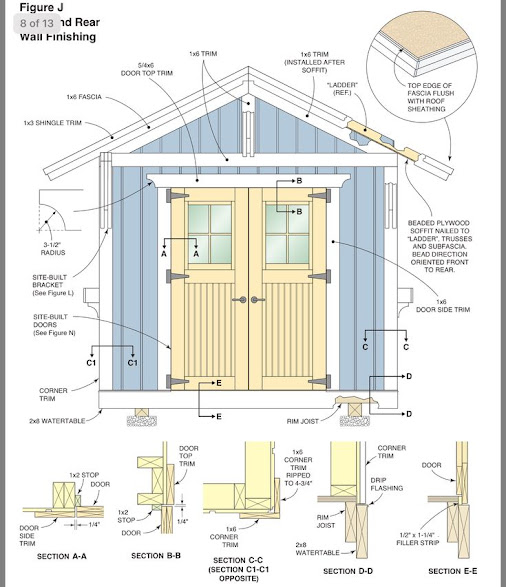
The Eight step, door installation.
Do not forget to prepare a door once you are done with your beautiful structure.
The easiest way to mount a door is to buy one from a nearby seller. The only problem would be that bought door tend to be of only specific sizes only and might not fit accordingly to the frame you had assigned for the door. So if you are to buy a door to ensure that you have made the right measurements on the door frame.
Remember since you are mounting a door, that means that you will be getting rid of one of the support columns which could be dangerous. To compensate for that, one should ensure the door has a strong header to support the heavyweight.
Note that it is recommended that the door frame should be half an inch larger compared to the door to ensure that it fits easily and also to provide a room where fresh air can get into the shed.
With these basic easy steps, your structure is complete. You may modify the interior of the shed according to how you will be using it. You may modify it by addition of shelves that you can mount on the walls of the structure. The added shelves also increase the storage capacity of your shed. You may also consider adding a lighting system to your shed, it is highly important. In the next phase of the guide, I will take you through the mistakes that are made in shed building so that you are not stranded in the mentioned silly mistakes.

Comments